Complete tutorial on making diamond painting coasters: A high-quality DIY guide that even beginners can master.

Want to get into diamond painting but haven’t decided where to start? If you want to begin with something simple, rewarding, and immediately usable, coasters are the perfect starting point. They’re not only beautiful and easy to make, but they can also quickly enhance your crafting experience. Below, I’ll explain the entire process, common pitfalls, and material selection in detail, ensuring your first coaster attempt is a success.
Table of Contents
Why start with diamond painting coasters?
If you’re new to diamond painting, coasters are one of the easiest projects to start with. I also chose coasters for my first attempt because:
- The finished product is small and compact, so you won’t feel anxious about making it because of its large size.
- With concentrated patterns and few color changes, it’s suitable for beginners to grasp the rhythm.
- The materials are cheap, and one set is usually enough to start construction immediately.
- Once it’s finished, it’s incredibly practical; you’ll really want to use it every day.
Moreover, to be honest, using diamond painting to make coasters results in a neater and more layered finish than traditional rhinestone application, and the finished product’s luster is simply—very soothing.
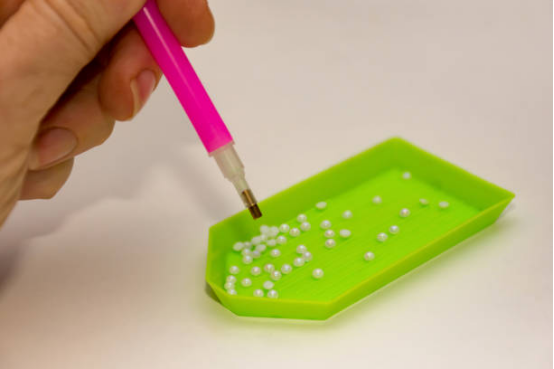
Complete tutorial on making diamond-painted coasters (one-stop guide)
Now, let’s get to the main content. I will try to use short sentences and break down the steps so that you can succeed simply by following them.
1. Prepare all materials
A typical coaster set includes:
- Coaster base (usually made of wood or acrylic)
- Diamond bags in various colors
- rhinestone stick, rhinestone dotting pen, wax
- Anti-slip mat or cork base
- A protective film or waterproofing agent (some kits include this).
If your kit doesn’t include a waterproof layer, I recommend getting a separate clear waterproof topcoat. Coasters are constantly exposed to moisture, and a top coat will make your creations more durable.
2. Begin applying the rhinestones (the most therapeutic step).
This is the most therapeutic stage of the whole process, but it’s also the easiest to lose focus. The following rhythm is the most comfortable process I’ve found through my own practice:
2.1 Adjusting the color of diamonds
Pour the diamond-studded bags into the designated compartments according to their numbers. If you pour them directly onto the table, trust me, you’ll regret it in less than 5 minutes.
2.2 Apply wax to the dot drill pen
- Many beginners easily overlook this step. Without wax, diamonds won’t stick.
- Press the dotting pen into the red or pink wax block.
- Press lightly 1-2 times to make the pen tip slightly sticky.
2.3 Apply diamonds according to their numbers
Each coaster base has a corresponding symbol number (similar to cross-stitch patterns).
- Find the number → Find the rhinestone. → Attract the rhinestone → Apply
- Press gently to hold it in place.
If a diamond is crooked, don’t panic. Just pick it up with tweezers and reattach it. Diamond painting inherently has a certain charm in that it allows you to “slowly fix the details.”
3. Tips to make diamond painting coasters more secure
Many beginners encounter a problem after making their coasters: the rhinestones easily fall off. Here are three tips to make your coasters more durable:
3.1 After all the adhesive has been applied, press it firmly once.
Press the drill with a thick book for 20–30 minutes to make it fit the base plate better.
3.2 Apply waterproof sealant
While this step isn’t mandatory, I highly recommend it.
- Lightly brush on a layer of clear top coat.
- Avoid repeatedly refreshing the same spot
- Air dry for 3–6 hours
The shine of the diamond will change slightly after the seal coat is applied, but its durability will increase several times.
3.3 Attach a cork base or anti-slip mat.
This way, the cup won’t slide when placed on the table, and it won’t scratch the table.
This is also a frequently searched long-tail keyword: diamond painting coaster reinforcement.
Frequently Asked Questions and Tips on Avoiding Pitfalls (The Most Common Mistakes for Beginners)
This is the most authentic advice I’ve gathered to avoid common pitfalls after watching many diamond painting coaster tutorials.
What if you don’t have enough diamonds?
Most brands will add more than 10% diamonds. If that’s still not enough, you can do this:
Use a similar alternative color, but only suitable for the background area.
Should I reattach the diamond if it’s crooked?
I suggest reposting it. If you make one mistake, everything around you might be affected.
The coaster is slightly bent?
Wooden baseboards may warp slightly after getting damp. Solution:
- Press the book under the heavy book for 24 hours before lamination.
- Alternatively, lightly spray a little water before pressing for faster results (but be careful not to get the drill wet).
Creative ways to use diamond painting coasters
If you want your work to be more “special,” try these methods:
- Make them into sets of coasters (e.g., seasonal themes/starry sky themes).
- As a housewarming gift or a small Christmas present
- Make your own work cup coasters and instantly elevate the atmosphere of your office desk.
- Paired with a transparent tray, it forms a “diamond painting tray set.”
The charm of diamond painting lies in its ability to make everyday life more refined.
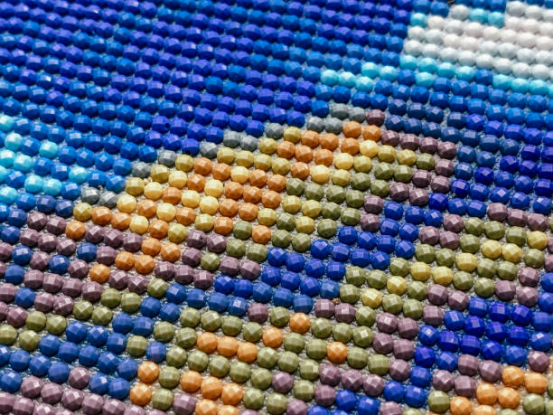
Conclusion: Take your diamond painting coaster to the truly “finished” stage.
The sense of accomplishment after completing a set of diamond painting coasters is hard to describe in a single sentence—it’s like piecing together small diamonds into your own little universe. As for the age-old question of “whether to seal it,” there’s no standard answer; it’s more of a creator’s choice.
If you want your coasters to be more durable, water-resistant, and abrasion-resistant, then boldly add a sealing layer; if you prefer the original sparkle, brilliance, and shimmer of diamonds, leaving them as they are is equally admirable. Most importantly, it’s about being willing to enjoy the process, rather than being bound by rules.
But no matter which path you take, you’ve already stepped into the most captivating category of people in the world of diamond painting: those who are willing to get their hands dirty, willing to try new things, and willing to bring more light into their lives.