How to fix non-stick diamond painting : My personal experience and practical solutions

As an avid diamond painting enthusiast, I know the satisfying feeling of finally completing a work of art by placing each gleaming diamond bit onto the canvas. However, over time, I’ve encountered a frustrating problem—the stickiness of my canvas begins to weaken, and the diamonds no longer adhere firmly. It’s a real headache! But don’t worry, I’ve found some very effective methods that help me restore stickiness . So today, I want to share my tried-and-true solutions with you, hoping they can help you if you’re facing the same problem.
Why does diamond painting lose its stickiness?
Before I began the restoration, I spent some time considering why the canvas had lost its adhesiveness. It turns out that many factors can affect the effectiveness of the adhesive. Understanding these factors allowed me to be more targeted during the restoration process and avoid similar issues in the future.
1. Exposure to dust and debris
Over time, dust, dirt, and various tiny particles gradually accumulate on the surface of the adhesive, causing it to lose its adhesion. I have experienced this firsthand, especially in dry or dusty environments, where the surface of the canvas is easily contaminated.
2. Frequent processing
I have touched the diamond painting cloth many times with my hands, especially when changing the position of the diamonds, and grease and dirt can easily transfer to the adhesive. As a result, the adhesive loses its grip.
3. Climate conditions
I live in an area with hot summers and dry winters, and extreme temperatures and humidity levels can really affect the quality of the adhesive. Especially when the humidity is too high, the adhesive becomes very soft, and the diamonds don’t stick as well.
4. Long-term use
Like many craft items, the adhesive on diamond painting cloths will naturally wear out over time, especially if you’ve been working on a lot of projects, as frequent handling can gradually weaken the stickiness.
My Restoration Process
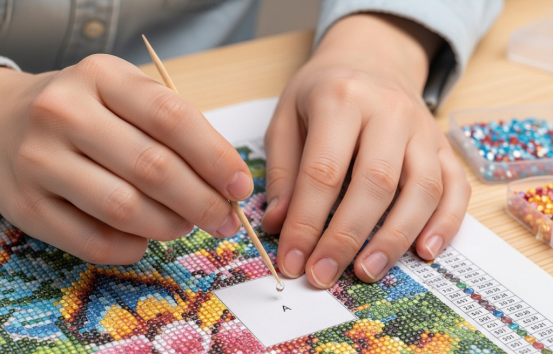
After understanding these reasons, I decided to take matters into my own hands and repair my diamond painting cloth. Below, I will share some of my steps and tips to help you solve this annoying problem.
1. Clean the canvas
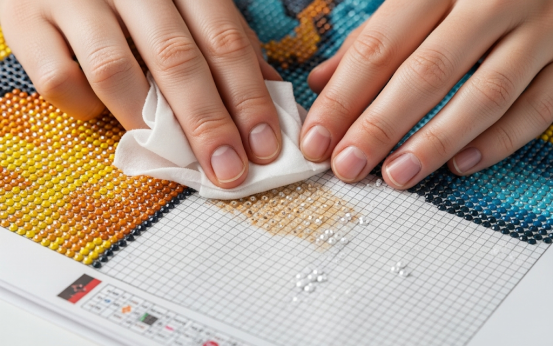
Cleaning is the first step in restoring the adhesive. Before repairing, I first took a soft cloth and gently wiped the surface of the canvas to remove accumulated dust and impurities. This ensures that the new adhesive will adhere better to the surface. This step is very important, as any oil or dust on the canvas will significantly reduce its adhesiveness.
2. Use a heat gun to heat the adhesive
Next, I tried using a hair dryer to heat the canvas’ adhesive. This method is surprisingly simple, yet incredibly effective. I set the hair dryer to low heat, hold it at a comfortable distance from the canvas, and gently heat the entire canvas. The heat softens the adhesive slightly, making it easier for the diamonds to reattach. I found this method particularly effective, especially in areas where the adhesive had weakened.
3. Try double-sided tape
If the hair dryer isn’t strong enough, I try double-sided tape. For small sticky areas, a small piece of double-sided tape can quickly fix the problem. I carefully cut the appropriate amount of tape and apply it to the non-sticky area, gently pressing it down to help the tape hold the diamond in place.
4. Use baby wipes
Believe it or not, baby wipes can also help restore the tack of diamond painting ! I use them to gently wipe the surface of the canvas, especially any areas that have lost their tack slightly. Afterward, I let the canvas dry completely, and the tack will return. This method is especially effective for areas with slight tack loss, but be careful not to overdo it, as it can cause the canvas to become too wet and tacky.
5. Apply transparent glue
For those particularly stubborn areas, clear, non-toxic glue is my undeniable lifesaver. After applying a thin layer of glue, the diamonds are firmly reattached to the canvas. I use a small brush or my fingertips to evenly apply the glue to the areas where the adhesive has failed, then gently press the diamonds until they are secure. Be careful not to overdo it, as this can stain the canvas or the diamonds.
How to maintain stickiness?
After the repair was completed, I didn’t let up, but took some precautions to ensure that my diamond painting would stick longer.
1. Proper storage
I’ve found that if you’re not careful when storing diamond painting, they can easily become exposed to dust and moisture. So whenever I’m not using diamond painting , I roll it up, adhesive side outward, secure it, and place it in a sealed bag. This way, the adhesive isn’t exposed, reducing dust and contamination.
2. Avoid extreme temperatures
I avoid placing diamond painting in direct sunlight, especially in hot and humid places in the summer. This can prevent the adhesive from drying out or becoming too soft and affecting its adhesion.
3. Keep it clean
When doing diamond painting , I take care not to touch the adhesive area too often with dirty hands and wash my hands before each operation. This prevents grease and dirt from affecting the adhesion of the canvas.
Summarize
Restoring a non-stick finish isn’t complicated, but it does require some patience and meticulous work. By cleaning, applying heat, and using double-sided tape or clear glue, I’ve successfully restored the stickiness of my diamond paintings , ensuring they continue to shine brightly for years to come. I’m confident that by following these steps, yours will be as good as new, too.
If you have the same problem, try these methods. Trust me, your diamond painting will be restored better than you can imagine!