Diamond Painting Screen Making: Creative Works Combining Decoration and Dividing Functions

In modern home décor, screens are not only tools for dividing space but can also become artistic focal points in a room. Diamond painting screens, in particular, combine creative craftsmanship with practicality, creating a home environment that is both private and artistic. By attaching diamond canvases to a screen, you can not only enjoy the fun of DIY but also create a unique piece of home decor. This article will provide a comprehensive analysis of the entire process of making a diamond painting screen, from material preparation, design concepts, production steps, practical applications, and cost analysis to maintenance, and includes a detailed FAQ to help you easily create a creative screen that combines functionality and aesthetics.
Table of Contents
I. Why choose Diamond Painting screens?
Traditional screens, typically made of wood, fabric, or metal, serve only a single function of partitioning. Diamond painting screens, however, combine decoration and partitioning. Diamond painting involves attaching shimmering resin diamonds to a canvas according to a pattern, creating a three-dimensional, sparkling visual effect. When applied to screens, this not only divides space but also transforms the screen itself into an artistic highlight of the room.
- Enhanced spatial aesthetics: The reflective effect of the diamonds makes the screen a visual focal point, adding depth to the room.
- The sense of accomplishment from crafting: Completing each canvas brings a sense of satisfaction and joy, making DIY enthusiasts happy.
- Suitable for multiple scenarios: Whether it’s the living room, bedroom, work area, or small shop display, the diamond painting screen can play a role.
Tip: If you’re a beginner, start by making small panels to familiarize yourself with the rhinestone application process and color separation logic before attempting larger screens. This will prevent fatigue and maintain your interest in creating.
II. Preparation of Materials and Tools
The key to successfully creating a diamond painting screen lies in thorough preparation. Below is a detailed materials list and practical tips:
1. Required materials
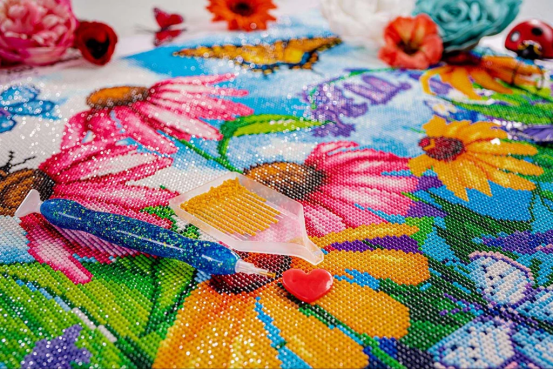
- Diamond painting canvas kit: Choose a canvas based on the size of the screen panel. You can choose ready-made patterns or customize your own designs.
- Screen frame: Wooden, lightweight metal, or folding fabric frames are all acceptable. Folding frames are easy to move, while fixed frames are more stable.
- Fixing tools: Double-sided tape or fiber adhesive, used to firmly attach the canvas to the screen.
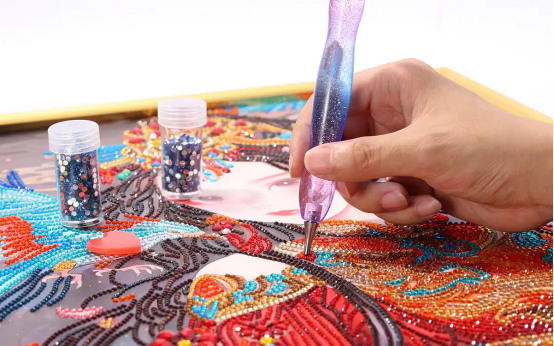
- Auxiliary tools: Diamond Painting pen, tray, diamond bag, etc.
- Protective materials (optional): Sealing spray or transparent adhesive layer for enhanced durability and easy cleaning.
2. Recommended Additional Tools
- Small rollers help the canvas fit flat against the frame.
- LED light strips: Enhance the reflective effect of diamonds, making the screen more eye-catching at night.
- Miniature green plants or hanging decorations: add a sense of nature and depth to a space.
User-friendly tip: Be sure to measure the screen size before finishing to avoid the canvas being too large or too small and to ensure a smooth fit.
III. Designing Diamond Painting Patterns
Before making a screen, designing the pattern is crucial. The design should not only be aesthetically pleasing but also take into account the style of the space and the structure of the screen panel.
1. Color and style matching
- Light-colored spaces: Suitable for warm colors or natural landscape patterns, making the space appear warm and soft.
- Modern minimalist style: Geometric patterns or gradient color blocks can create a visual focal point.
- Children’s room or creative corner: Cartoon or fun patterns add a lively touch.
2. Panel Segmentation Strategy
Screens typically have 3–5 panels, which can break down the overall design into individual block-shaped canvases:
- Single-piece completion: Each canvas is completed independently, and when combined, they form a complete picture.
- Collage: Multiple small canvases are combined to form a large image, creating a strong visual continuity.
3. Enhanced Creativity
- Leave a small blank border, which can be used to hang ornaments or small plants to enrich the sense of layering.
- Adding elements such as sequins or gold powder to the pattern makes the screen shine even brighter under the light.
Small jump: When DIYing, you can take photos to record the progress of each canvas, which is both rewarding and convenient for later assembly.
IV. Production Steps: From Canvas to Diamond Painting Screen
1. Complete the Diamond Painting canvas.
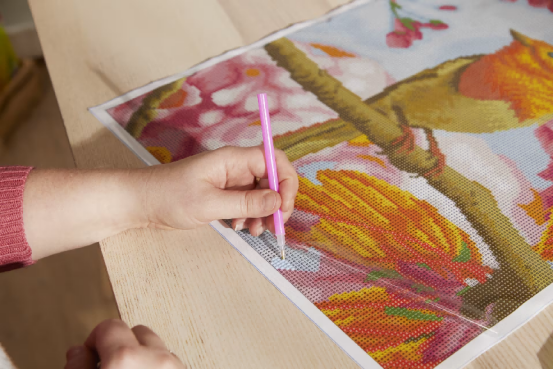
- Lay the canvas flat to avoid wrinkles.
- Apply the diamonds one by one according to their numbers, completing one small piece at a time to avoid fatigue.
- Optional: Apply sealant to enhance durability.
Humanized tips: Wear a magnifying glass or an eye-protecting lamp when making it to reduce eye fatigue.
2. Mount the canvas to the screen frame.
- Method 1: Double-sided tape fixation: Apply adhesive to the edge of the frame and the back of the canvas, and press to adhere.
- Method 2: Fixing with fiber glue (wooden frame): Apply a thin layer of glue to the frame, fix the canvas, and wait for it to dry.
Tip: First, fix the four corners, then slowly press down the middle part to prevent the canvas from curling or wrinkling.
3. Creative Upgrade
- Lighting effects: Install soft LED light strips along the edges of the screen to make the diamonds sparkle.
- Green plant decoration: Hang small green plants on the side of the screen to add a sense of nature.
- Carved frame: Add carving or openwork design to the wooden screen to enhance the three-dimensional effect.
User-friendly advice: When making DIY projects, it is recommended to spend 30–60 minutes each time to avoid excessive fatigue of the eyes and fingers.
V. Application Scenarios of Diamond Painting Screens
1. Living room partition
Placing a diamond painting screen behind the sofa can divide the living room and dining room spaces while creating a visual focal point. Pairing it with warm-toned lighting and wooden furniture creates a more harmonious overall atmosphere.
2. Bedroom or work area
Screens serve as visual barriers, providing privacy while enhancing the artistic ambiance of a room. They are suitable for use beside a bed or desk, creating a comfortable personal space.
3. Multifunctional space
Screens can be temporarily placed in yoga corners, reading corners, or children’s play areas to achieve flexible space division. Folding screens are easy to move, allowing for adjustments to the room layout at any time.
Tip: You can hang small storage bags or hooks on the screen to increase storage capacity.
VI. Diamond Painting Maintenance and Care Techniques
- Avoid direct sunlight to prevent color fading.
- If a diamond becomes loose, it can be gently secured with transparent tape.
- Wipe away dust regularly with a soft, dry cloth.
- Check the hinges or connections of the folding screen to ensure they are secure.
User-friendly tip: When used in high-traffic spaces, it is recommended to check the diamond fit quarterly to prevent it from falling off and affecting the appearance.
VII. Cost and Budget Analysis
- Starter kit: $10–$30, suitable for small screens or practice.
- Mid-range kits: $30–$100, suitable for standard screen sizes.
- High-end kits: $100+, suitable for large or high-precision patterns.
Budgeting tips: Beginners can start with lower-priced kits and upgrade to mid- to high-end kits once they’ve confirmed their interest, avoiding overspending. Combining seasonal promotions or package deals can help control expenses.
VIII. Community Experience Sharing
- DIY enthusiasts suggest completing the small panels first and then assembling them into a large screen.
- Screens decorated with LED light strips and green plants are becoming more popular.
- Regularly taking photos to document your work provides a sense of accomplishment and makes it easier to share on social media.
9. FAQ
Q1: How to choose the size of the screen canvas?
A1: Height 150–180 cm, width divided according to the panel, convenient for production and transportation.
Q2: Is sealing protection necessary?
A2: It is recommended to apply a sealant or transparent adhesive layer to prevent diamonds from falling out and dust from accumulating.
Q3: What if the canvas is too big to work with?
A3: It can be completed in sections. Each canvas is fixed independently and then combined into a screen.
Q4: How to do daily cleaning?
A4: Simply wipe away dust with a soft, dry cloth. Avoid using water or a wet cloth.
Q5: How to enhance visual depth?
A5: You can add LED light strips, hang green plants, or sculpt frames or small ornaments.
Q6: Which spaces are suitable for diamond painting screens?
A6: They can be used in living rooms, bedrooms, work areas, and shop display areas. Their flexible movement increases their versatility for various scenarios.
X. Summary and Action Guidelines
Diamond painting screens are DIY projects that combine art and function.
- The process of making things by hand is full of fun and a sense of accomplishment.
- Flexible application to various home or commercial scenarios
- Creative upgrades (lighting, greenery, sculpted frames) can enhance the visual effect.
- Reasonable budgets and kit selection make the creative economy sustainable.
Create your own diamond painting screen to make your home both private and artistic, while enjoying the pleasure and satisfaction of DIY.