Diamond painting creation steps detailed: from preparation to completion

Diamond painting is a hands-on art activity that both relaxes and showcases artistic creativity. From initial design to final completion, every step is filled with both fun and challenges. Understanding the creative steps of diamond painting is crucial for beginners, while for experienced enthusiasts, meticulous attention to detail allows for the creation of even more refined works. So, how do you create a beautiful diamond painting from scratch ? Below , we’ll explain the steps involved.
Step 1: Preparation
1. Choose the right diamond painting kit
A diamond painting kit is essential for creating artwork. It typically includes a canvas, diamond particles, tools (such as a diamond pen and plate), and instructions for creating your own designs. Choosing a design that you like is crucial. A wide variety of themes and designs are available, including landscapes, animals, portraits, and abstract art. Beginners can choose simpler designs, while more experienced artists can tackle more complex designs.
suggestion:
- Make sure the complexity of the pattern matches your current skill level. Beginners can start with simpler, solid-color patterns, while more experienced players can experiment with patterns that incorporate detailed gradients.
- Make sure you choose a kit that includes everything you need: canvas, diamond particles, tools, and pattern instructions.
2. Prepare the work area
creating diamond painting , you need a clean, uncluttered, and well-lit workspace. Diamonds are very small and can easily fall or scatter, so make sure there is enough space on your desk to spread out your canvas and keep your tools within easy reach.
suggestion:
- Cover your work surface with a tablecloth or large paper towels to make cleaning up debris easier.
- Keep the surrounding area clean to avoid clutter from diamond particles.
Step 2: Understanding Patterns and Diamond Grains
1. Observe the pattern details
Before you begin diamond painting , carefully review the pattern and instructions. Most diamond paintings will indicate the symbol or number corresponding to each color. The pattern will also include color blocks, each of which needs to be filled with diamond particles of a specific color.
suggestion:
- Refer to the pattern and diamond grain color chart to make sure you understand the specific color each symbol represents.
- Most diamond painting kits will provide a simple “color card” to help you quickly identify diamond particles.
2. Arrange diamond particles
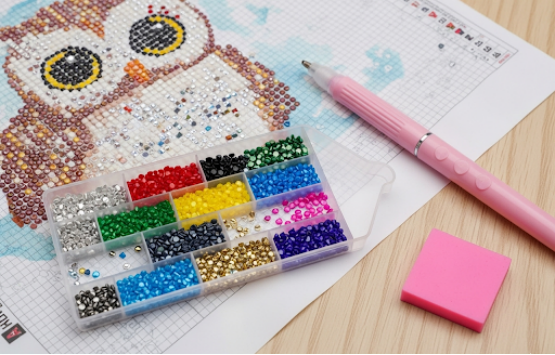
Diamond granules are usually sorted by color, and may come in multiple small bags, each containing granules of the same color. Using a small tray or a diamond painting plate to organize the granules will make your work more convenient and efficient. To avoid confusion, make sure each color of granules is in a separate area.
suggestion:
- Use multiple compartment trays to easily sort and store diamond particles.
- Shake the tray so the pellets are facing up for easy access.
Step 3: Start diamond painting
1. Choose a small area to start
Initially, you can choose a small area within the pattern to work on. Often, many hobbyists start with the corners of the pattern or the most easily recognizable part of the pattern. This way, you can gradually complete smaller sections and gradually become familiar with the manipulation of diamond particles.
suggestion:
- When using a diamond pen to absorb diamond particles, gently press the top of the diamond pen to ensure that the particles are firmly absorbed on the pen tip.
- If the diamond particles are not sticky enough, you can press the pen tip slightly to help the particles adhere.
2. Use the diamond pen and the sticky layer on the canvas
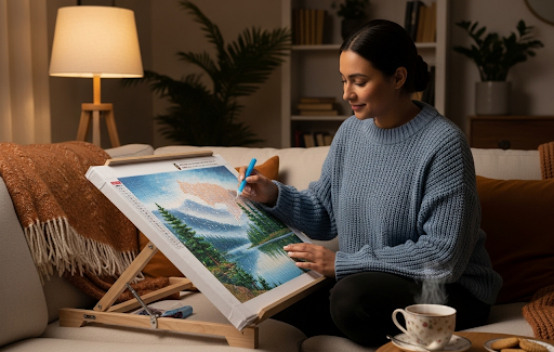
A diamond pen is the most common tool used to precisely place diamond particles on canvas. Each diamond particle has a small adhesive coating on the bottom, which allows it to stay firmly in place on sticky canvas. Simply press the diamond pen onto the diamond particle and gently position it.
suggestion:
- If the diamond particles are small, you can try applying a little diamond glue to the tip of the pen to help the particles stay in place more firmly.
- Choose a small area to work on at a time to avoid clutter.
3. Fill with diamond particles according to the pattern
Once you’ve mastered the use of the diamond pen, begin filling in the pattern with diamond particles, following the color zones. As you complete one area at a time, gradually expand the area around it, ensuring each area has a consistent color. To maintain a neat pattern, avoid touching the completed diamond particles with your fingers, as this will affect the canvas’s adhesion.
suggestion:
- Don’t rush to complete the entire pattern, you can do it in sections and steps.
- If you accidentally place a diamond particle in the wrong place, use tweezers to gently remove it and reposition it.
Step 4: Finish the painting and organize it
1. Fill the entire pattern
Over time, the diamond particles will gradually fill in every area of the pattern. Once all areas are filled, your diamond painting will gradually show bright colors and clear shapes. At this point, you can carefully examine every detail to make sure nothing is missed.
suggestion:
- After filling, you can use a soft cloth to gently press the entire picture to help the particles stick more firmly to the canvas.
- If some particles are not firm, you can heat it slightly to increase the stickiness.
2. Fixed screen
most diamond paintings are completed, they are secured with special adhesive tape or a cover to prevent the diamonds from loosening or falling out. Framing the painting or storing it in a frame for display can protect the work and make it last longer.
suggestion:
- When placing the picture frame, make sure the entire picture is flat and avoid moisture or external impact.
- Consider framing your diamond painting for home decoration or as a gift.
Summarize
diamond painting may seem simple, meticulous attention to detail in every step is crucial to the final result. From preparing materials to gradually finishing each area, every detail can impact the overall effect of the work. By managing your time wisely and gradually filling in areas of color, you’ll ultimately create a diamond painting filled with brilliance and exquisite beauty .
trying diamond painting for the first time HYPERLINK “https://salediamondpaintings.com/shop/” or are already an experienced artist, following these steps will help you smoothly complete the entire creative process. Most importantly, enjoy the process, unleash your creativity, and feel the joy of lighting up your life with diamond particles!