Diamond Painting Notebook Cover DIY: Let the shining handmade art blend into your daily inspiration

Have you ever thought about the glitter of the diamond painting on the cover of your open notebook?is actually the product of a quiet moment of creation?
A delicate flower, a soothing phrase—
when the shimmer of diamond painting blends with the texture of a notebook,
Recording your daily life becomes more heartwarming and ritualistic.
Just This article will walk you through the steps of creating your own diamond painting notebook cover.
No complicated tools or specialized skills are required.
Just a little patience, and you can make an ordinary notebook unique.
1. Preliminary preparation: choosing the right materials determines the quality
Sparkle Many people stumble over materials when they first try. The key to a
diamond painting cover is “both sparkle and stability”—the
Sparkle comes from the diamond’s luster, and the stability comes from the firmness of the adhesive.
Materials List
| Material Category | Recommended choice | Pitfall Avoidance Reminder |
| notebook | Hard cover (leather, PU, paper hard cover are all acceptable), with a flat cover without bulges; A5 or A6 size is more convenient to carry | Avoid softcover books, as they will deform; covers with three-dimensional textures are difficult to stick on |
| diamond painting patterns | Small size, simple pattern (such as flowers, letters, cartoon portraits), 2-3cm smaller than the cover | Patterns that are too large or too complex are difficult to cut and appear heavy. |
| Fixing material | Thin, high-viscosity double-sided tape + transparent waterproof sealant (such as epoxy or self-adhesive film) | Do not use foam glue or ordinary glue, as it may bulge or bleed easily. |
| Assistive tools | Scissors, scraper, tweezers, ruler | Avoid using a utility knife or hard brush, as this may scratch the diamond or cover. |
Tips for choosing patterns
Select by style:
- Look. Leather notebook: Choose letters, retro patterns, gold and silver diamonds for a high-end look.
- : Paper cover → Daisies, cartoons, green plants, and bright diamonds make it more refreshing.
According to the purpose:
- Going”). Study notebook: Post motivational phrases (e.g., “Keep Going”);
- Work notebook: Choose a geometric pattern or minimalist design;
- Gift notebook: customize the elements that the other person likes, showing your thoughtfulness.
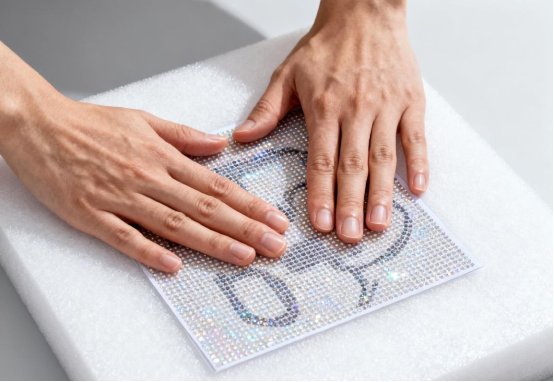
2. Production steps: from measurement to sealing, five steps to complete
But a diamond painting notebook cover is not complicated.
But details determine the texture. The following five steps are worth patience for each step.
—Make Step 1: Measure and Cut—Make the Pattern Fit Perfectly
First, use a ruler to measure the cover’s dimensions.
For example, if the cover is 14 x 21 cm, cut the diamond painting into 12 x 19 cm.
Leave a 1 cm border around the edges for a neat and unobtrusive look.
First, when cutting, slowly cut along the edge of the diamond;
If you encounter a curved area, you can cut straight lines first and then round the corners.
After cutting, don’t rush to attach it—
First check the edge for loose diamonds and gently press them with tweezers.
step.”Step 2: Clean the cover—don’t ignore this “invisible step.”
Diamond If the cover is dusty or greasy, even the most beautiful
Diamond painting won’t stick properly. For leather covers, gently wipe with an alcohol pad; for paper hardcovers, dust with a dry cloth.
Once completely dry, lightly draw crosshairs with a pencil to facilitate alignment.
Step 3: Paste—from the center to the edge, avoiding bubbles
First, use the first tear off a corner (about 2 cm) of the back of
the diamond painting, align it with the center of the cover, and gently press it firmly.
Once the position is correct, slowly peel off the remaining adhesive and
Use a scraper to press from the center outward to the sides to expel any air.
Tips:
Don’t rush to tear it off when small bubbles appear. Just use a scraper to gently push it to the edge.
Pulling it directly will easily cause the diamond to fall off.
—making Step 4: Reinforcement—making the cover more durable
Check the edges and apply some clear nail polish to any loose gaps.
It acts like invisible glue, securing the cover without affecting its aesthetics.
For leather covers, apply a layer of thin, clear tape to further protect the edges.
—Step 5: Sealing layer (optional)—a must for high-frequency users
It’s if you carry your notebook around a lot.
It’s recommended to add a protective layer.
You can use a transparent film or a thin layer of adhesive.
A thin layer can improve the wear resistance and make the diamond shine brighter.
3. Use and maintenance: make the shine last longer
Once you’ve built it, you want it to stay shiny and bright.
A few small habits can go a long way in extending its life.
Daily use
When opening and closing a notebook, move slowly and don’t lift the cover violently;
When carrying it outside, put it in a protective case or a sandwich layer;
(bathrooms, Keep away from moisture and humid environments (bathrooms, next to teacups, etc.).
Cleaning and Restoration
Wipe gently with a dry cloth or a slightly damp soft cloth. Do not use alcohol-based cleaners.
If a diamond falls off, use tweezers and double-sided tape to fix it again, pressing for 30 seconds;
If the seal layer is scratched, you can repair it by applying a thin layer of transparent nail polish.
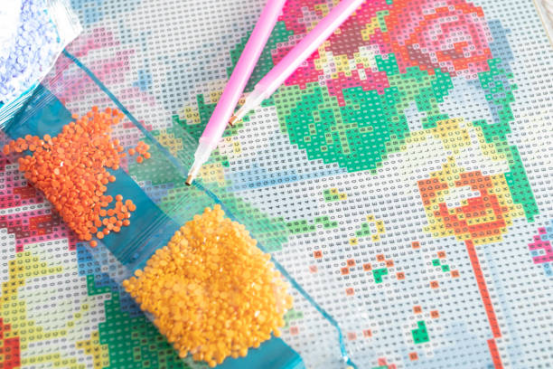
“personalized.” 4. Creative extension: make the cover more “personalized.”
Once you’ve mastered the basics, try some new twists.
1. Border decoration
Stick a circle of diamonds of the same color around the pattern or draw lines with a metal pen
to instantly enhance the layering effect.
2. Detachable design
First, apply the diamond painting to a transparent PVC film.
Then secure it to the cover with removable double-sided tape.
This way, when you want to change the pattern, you can simply peel it off.
3. Exquisite embellishment
A small amount of pearls and metal rivets are good additions.
but remember to “stop at just enough”—
Too much will steal the show from the diamonds.
Conclusion: Integrate “Shining Handicrafts” into Life
Their Diamond painting notebook covers are more than just a DIY experience;
They’re a way to slow down your life.
When you put the last diamond on,
the focus, tenderness, and sense of accomplishment you felt
will reappear the next time you write.
Whether for personal use, gift giving, or collection,
this notebook is more than just a tool for recording inspiration;
It’s more like a flashing reminder: