Diamond Painting Foam Board Framing Guide: 6 Steps to Transform Your Work into Home Decor

After completing a diamond painting, many people face the same dilemma: while the work may sparkle, it’s just a flabby canvas. How can one transform it into a finished product ready for hanging on the wall? While there are many methods, the most cost-effective is foam board mounting.
It requires no expensive tools, is low-cost and easy to use, and keeps the canvas flat and unwarped. Even if you’re a first-time diamond painting novice, you’ll be able to master it in one go. Whether you’re creating a small diamond sticker or a large, fully diamond-covered canvas, follow this guide to easily transform your work into home decor.
1. Prepare the tools: 5 things are enough
Don’t worry, you don’t need any professional equipment to do this; common tools at home can come in handy:
- Foam board: We recommend high-density foam board with a thickness of 1–2 cm (it’s stiffer and less prone to bending than regular foam board). It should be slightly larger than the diamond painting board, 5–10 cm, for easier cutting later. You can buy it at stationery stores and online, and A4-size sheets cost about 5–10 yuan each.
- The finished diamond painting: First, make sure the diamonds are firmly attached and not loose. If there are any blank areas around the edges, you can leave them as is and work on them later.
- Ruler + pencil: used for measuring and drawing lines. The ruler should preferably be at least 30 cm long.
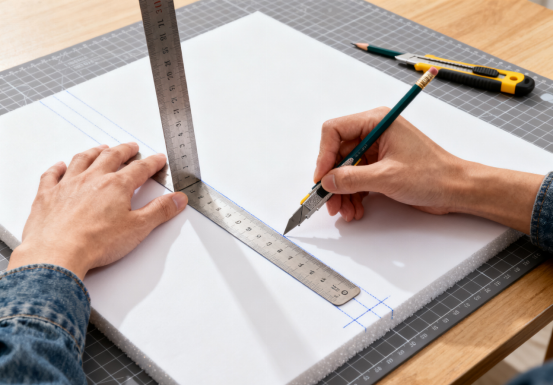
- Utility knife + cutting mat: standard equipment for cutting foam boards. The cutting mat can protect the tabletopand make the cut smoother.
- Double-sided tape: Choose high-viscosity cotton paper double-sided tape, which has good adhesion and resists warping over time. Avoid using clear tape or spray glue—the former is too weak, and the latter dries too quickly, making it easy to apply the tape crookedly.
2. Practical steps: 6 steps to complete
The key to foam board mounting is alignment and security. Follow these six steps and you’ll have virtually no problems.
1. Measuring diamond painting
Only measure the diamond pattern; don’t include the white border.
Tip: If the border is particularly wide, you can cut it off. If it’s narrow (around 1 cm), you can keep it and fold it over to the back for a neater look.
2. Cut the foam board
Use a ruler to mark the dimensions, then slowly cut with a utility knife. Tilt the knife at a 45-degree angle and gently cut. Don’t rush to cut all the way through; multiple cuts will result in a smoother finish.
If there are any burrs on the edges, gently sand them with sandpaper or scrape them with a utility knife.
3. Apply double-sided tape
Start by applying the adhesive around the edges, then apply it horizontally and vertically in the center, staggered with approximately 5 cm intervals. This ensures even adhesion and prevents bulging.
Don’t skimp on this step; the more carefully you apply the adhesive, the easier it will be later.
4. Align and paste
This step is crucial. Align the diamond painting with the center of the foam board, aligning the top edge first, and then slowly lower it.
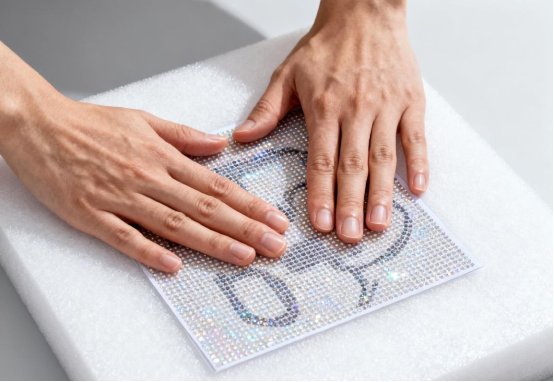
Once it’s attached, gently press from the center outward with your palm, being careful not to apply too much pressure to prevent the diamond from falling.
If you’re retaining a white edge, you can fold it over and secure it with double-sided tape.
5. Trim excess foam board
If the foam board is 1-2 cm larger than the painting, turn it over and cut off the excess from the back. This is safer and less likely to damage the diamond.
6. Add some decoration (optional)
The finished product is ready to hang, but if you want a more textured look, you can upgrade it a bit:
- Framing: Buy a glassless photo frame and directly put the foam board into it. It is light and will not block the luster of the diamond.
- Wall hanging: stick a traceless hook on the back, or fix a hemp rope and hang it up at any time.
- Desktop placement: Use a small easel to support it, and place it on the desk or bedside table to add a touch of warmth.
3. Pitfall Avoidance Guide: Common Mistakes Beginners Make
- Don’t use transparent tape instead of double-sided tape: the stickiness is too weak, and it easily leaves glue marks.
- Don’t cut the foam board with one sharp cut: it will easily split. It is best to cut it gently several times.
- Don’t start from a corner: it will easily become crooked. The correct way is to align the top edge and then place it down slowly.
Summarize
Foam board framing diamond paintings is a truly affordable and effective method. It not only protects the work but also makes the canvas three-dimensional and stiff, making it look more like a complete work of art.
Hanging it in your living room, bedroom, or even as a gift, it’s a truly impressive sight. Next time you finish a diamond painting, spend half an hour trying this method—you’ll likely find your work even more stunning than you imagined.