Diamond Painting Creative Extension: DIY tiles and old furniture transformation, let shining art into life

,After completing a diamond painting , many people frame it and hang it in their living room or bedroom. But it can do so much more. Have you ever thought about making that gleaming work a part of your home? Use it to decorate tiles, refurbish old furniture, and truly bring your handmade creations to life.
Below, we’ll share two fun and practical extensions to diamond painting: tile creation and repurposing old furniture. These methods not only give your work a second life but also add a unique touch to your home.
1. Homemade diamond painting tiles: not only artistic but also practical
Diamond Painting tiles are both aesthetically pleasing and functional, making them suitable for kitchen backsplashes, bathroom decorations, and even coasters and trays, making sparkle a part of everyday life. Even better, the production process is simple, making it easy for even novice crafters to master.
1. Prepare the ingredients: simple but crucial
To make a beautiful diamond painting tile, you need to prepare:
- Core materials: Finished diamond painting (small size such as 10×10cm is most suitable), ceramic tiles (smooth surface and light color are best), waterproof glue (epoxy resin glue or transparent glass glue is recommended)
- Auxiliary tools: scraper, sandpaper, tape measure, pencil, utility knife, disposable gloves and mask
- Tips: The flatness of the tiles determines the finished product. It is recommended to choose ceramic tiles with no texture on the surface.
2. Production steps: Four steps to make the sparkle last longer
Step 1: Trim and prime:
Cut off the excess canvas edges of the diamond painting, leaving only the diamond area; lightly sand the edges of the tile with sandpaper and wipe clean to remove dust and oil.
Step 2: Accurate positioning and pasting: Draw the positioning line of
the diamond painting on the tile, apply a thin layer of waterproof glue, and then align the back of the diamond painting and press lightly.
Step 3: Compact and remove bubbles. Details determine success or failure.
Use a scraper to push from the center outward to expel air and excess glue. If glue overflows, wipe it clean immediately with a damp cloth.
Step 4: Let it cure and wait for the miracle to happen.
Let the work dry naturally for 24-48 hours (depending on the type of glue). Finally, apply a layer of transparent protective glue on the surface to make the diamond more solid and waterproof.
3. Application Scenario: Make Small-Sized Works Shine
Kitchen/bathroom decoration: Splice several small tiles and stick them behind the stove or around the sink to add a sense of light to daily housework.
Practical gadget: A single diamond painting tile can be used as a coaster, trinket tray, or entryway ornament.
Gift ideas: Customize patterns according to the preferences of your friends and family, such as flowers or zodiac signs. The warmth of handmade gifts is more touching.
2. Renovation of old furniture: making “old objects” shine
Some furniture may have been left unused due to scratches or fading, but it is still strong and useful. In this case, you might as well give it a new look by using diamond painting.
1. Before the renovation: Choosing the right furniture
Not all furniture is suitable for diamond painting transformation. The following is a simple reference:
Recommended: wooden desks, bedside tables, dressing table mirror frames, wardrobe doors and other flat surfaces;
Not recommended: fabric sofas, chairs, dining table tops, and other areas with frequent friction.
Please clean the surface before remodeling. If necessary, use sandpaper to lightly polish and a wood crayon to repair scratches to ensure that the glue sticks more firmly.
2. Three ways to make old things shine
Option 1: Localized embellishment: Low-cost, high-brightness.
If a piece of furniture has noticeable scratches, apply one or two diamond painting tiles to conceal the flaw and create a decorative focal point. For example, a symmetrical diamond pattern on the corner of a bedside table creates a compact and sophisticated look.
Option 2: Edge decoration to enhance the lines.
Cut diamond painting into thin strips (3–5 cm wide) and apply them to the edges of mirror frames and cabinet doors, replacing the cold metal lines with a soft sheen. This is ideal for those who prefer minimalist decor without extensive renovations.
Option 3: Complete renovation to create a new visual centerpiece.
If the surface of old furniture is severely worn, you can cover the entire panel with a diamond painting. After applying a coat of waterproof protective glue, the once dull cabinet will instantly become an “art installation.” Imagine a nightstand with a blue starry sky pattern, illuminated by a nightlight; it feels as if a galaxy flows through the bedroom.
3. Maintenance and upkeep after renovation
To keep the gloss of diamond painting longer:
- When cleaning, use a soft dry cloth or a slightly damp towel and avoid using chemical cleaners.
- it.If the diamond is loose, you can use a toothpick dipped in a small amount of waterproof glue to re-secure it;
- Avoid prolonged exposure to high temperatures or humidity.
- These small details can make your creative works last longer and still shine as brightly as before.
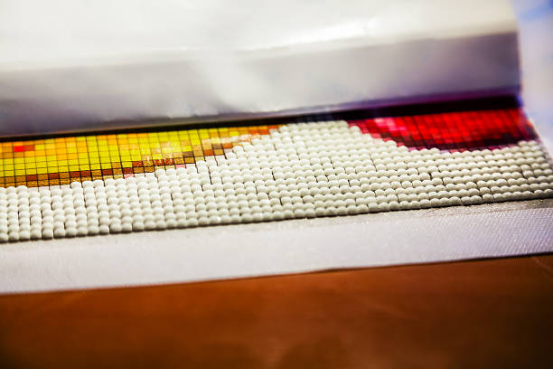
3. From decoration to life aesthetics: making DIY a part of daily life
decoration butDIY diamond painting is not just a static decoration, but also a lifestyle.
When you use your own hands to make a painting a part of your home, the sense of accomplishment is irreplaceable by any purchased decoration.
EveryEvery time of pasting, polishing and curing is a manifestation of slow life;
every shining tile is the warmth you have accumulated over time.
creation butWhether it is a small tile in the corner of the kitchen or old furniture that has been given a brand-new look, they are quietly reminding you that
The meaning of handmade is not just creation, but also making life shine.
Conclusion: What shines is not just diamond painting but also the light you bring to life.
Diamond painting tile and furniture renovations are one of the best ways to bring art to life. It doesn’t require advanced skills, but the possibilities are endless.
Next time you finish a project, try taking that old tile or cabinet and breathing new life into it with your creativity.
When light shines into the room, those tiny flashes will remind you of the concentration and joy you felt when you first created the work.